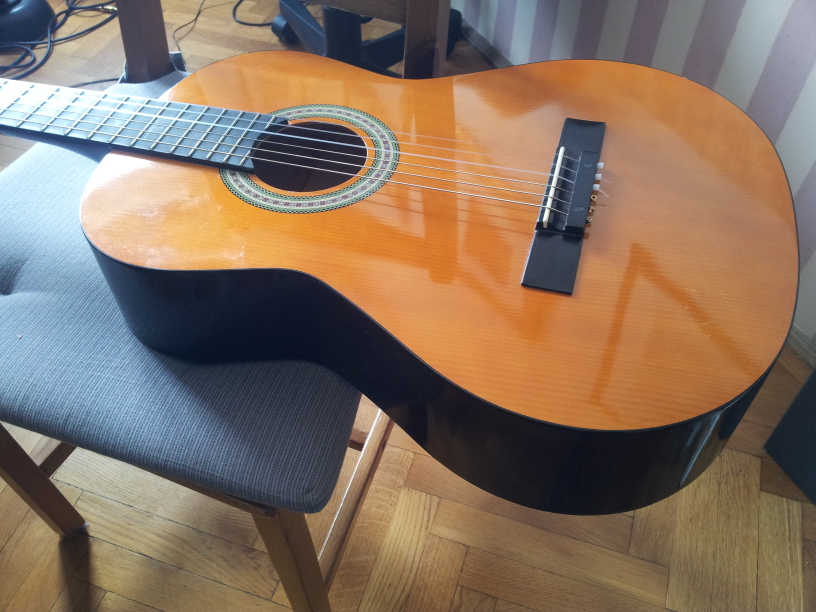
A few years back I bought a budget acoustic nylon guitar from Lidl. The action was appalling, but easily cured (maybe I’ll do a separate article on that soon). A fresh set of Fender folk nylon strings and the sound quality miraculously improved. Maybe it’s those silver wound bottom strings doing that. This article is for those of you who might have an acoustic lying around somewhere that you’d like to install a piezo pickup and preamp inside, transforming it into an electro-acoustic. It’s surprisingly easy if you get the right kit. Total outlay including buying some masking tape and new hacksaw blades was less than a tenner (a.k.a. 10GBP).
The most important parts I bought as a single kit off e-bay direct from Hong Kong. Do a search for “4 Band Acoustic Guitar Preamp Amplifier EQ 7545R Pickup” and hopefully you’ll find one just like mine. Total cost to Hungary including the postage was about 5 GBP. For this you get a piezo pickup, the preamp, wiring and the jack socket, some screws, washers and a nylon tie – but absolutely nothing in the instructions department! It took several weeks to arrive but was worth the delay – you can pay more for the identical kit from more local shops if you don’t want the wait.
Here’s what you get out of the package.
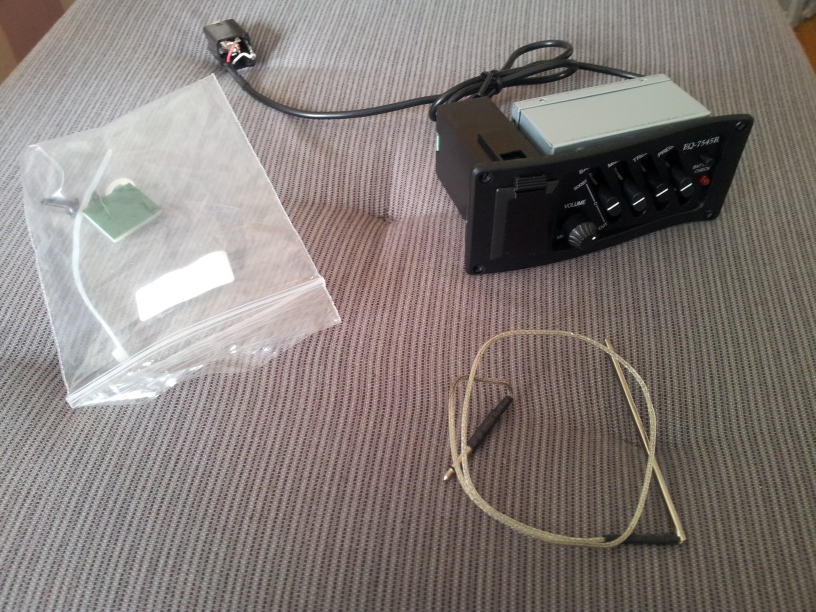
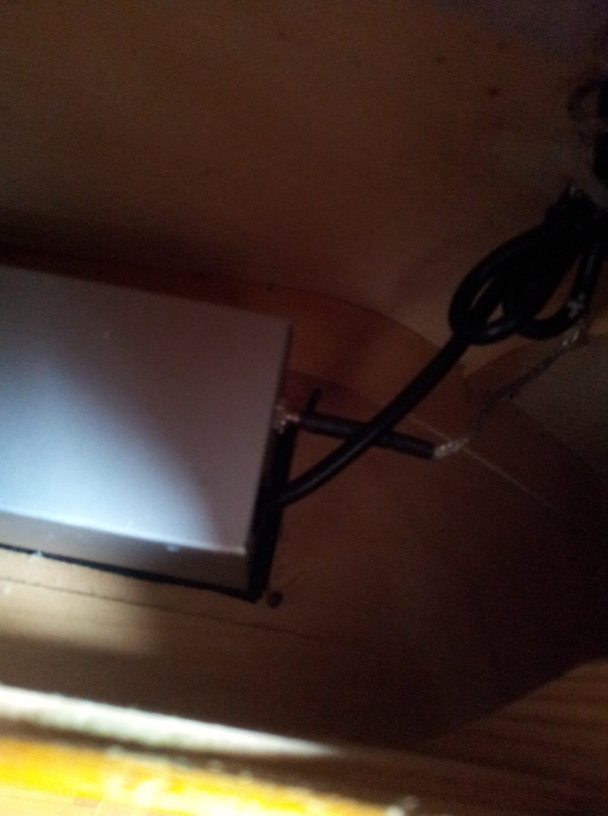
Starting from top right, the big black and metal box with the wire hanging from it is the “brain” of the kit. Inside this box is a 4-band preamp (you can see the little sliders to control it at the front) and the battery compartment. It takes a single 9V rectangular battery that in theory should have been supplied with the kit, but didn’t turn up in mine. Maybe the customs and excise people just don’t like things that go “zing” when you put the terminals on your tongue, or maybe they were short of one for their crybaby wahwah pedal. The wire hanging out of the back has the 1/4″ output jack socket on the end which is where your guitar cable will plug in.
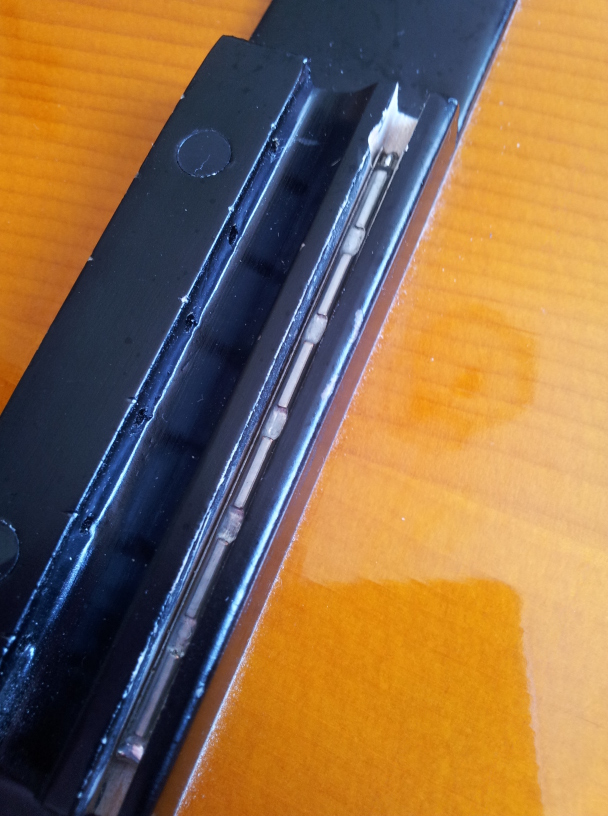
Moving to the bottom right, that little coil of cable has on one end a mini jack plug which fits into the pre-amp once it’s all in place. On the other end is the actual thing that makes this all work – a thin metal bar containing the piezo sensor at right angles to the cable. As to why it’s like that, will hopefully become more obvious once we get installing the kit.
On the left is a little plastic bag containing 4 screws, a cable tie, a sticky backed cable tie clamp and some washers.
The most important first tip to give is to take your time! Before you do anything else, destring the guitar, and don’t lose the saddle! We will definitely need that later!
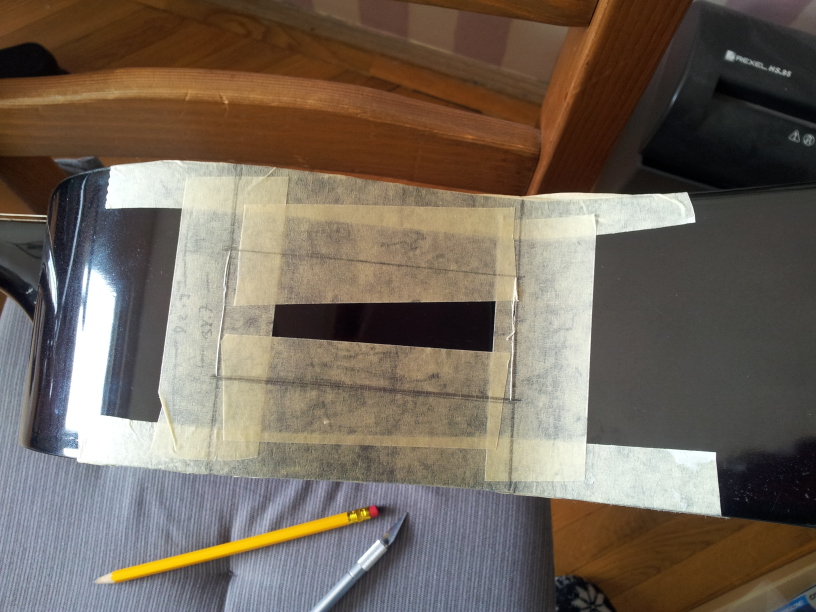
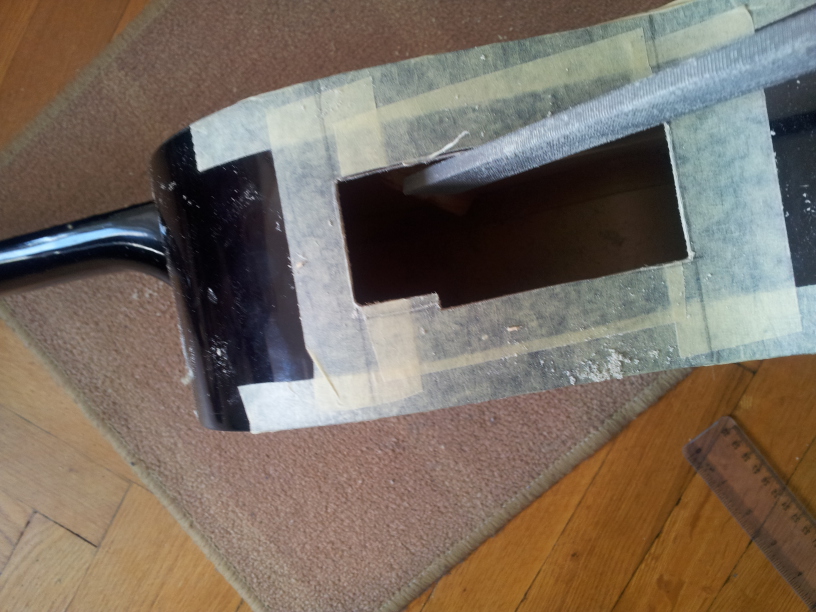
First step is to cut a hole to take the preamp box in the side of the guitar. The best way of doing this is to apply some lo-tac paper masking tape to the area where it’s going (you want it on the top facing up towards you when playing, on the left hand side). Slide the preamp up and down on the outside of the guitar’s curve until you find the “sweet spot” where the molded curve of the pre-amp fascia matches (as close as you can) the curve of the body. Use a pencil to mark the limits of the inside of the pre-amp, then repeat on the other side of the guitar. Using the masking tape helps to make pencil marks without scratching the guitar. Once you have located the lefty-rightyness correctly, draw two vertical lines. Now find the centre point by measuring the height of the guitar, subtract the height of the inside of the pre-amp, divide by 2 and now make a mark on the verticals like on the picture using that number. Draw the whole box and lightly cut around the rectangle using an X-ACTO knife – this helps to stop any chipping of the varnish one we start getting rough with the woodworking!
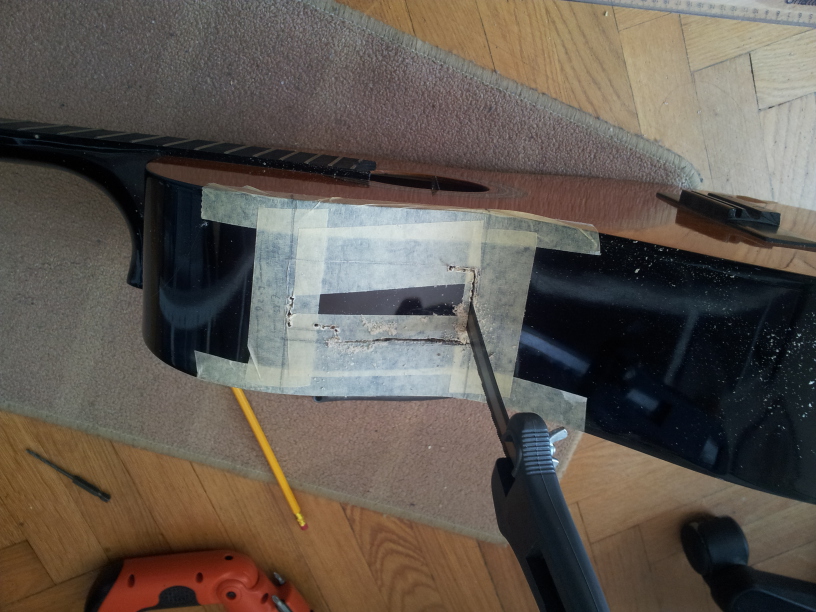
Drill 3-4 starter holes using a small bit at the start of each cut. Use a stanley knife to cut between the starter holes. Use light pressure or it might crack! Then saw along the lines using a hacksaw blade with a handle designed to hold the blade in one place only. You can see I slightly adjusted the cutting rectangle so that it would come in by a few mm where the battery box is, to make a tighter fit.
Once we’ve cut the rough shape out, use a file to get the edges nice and straight. Don’t overdo this bit as the file really does get through the wood like a hot knife through butter! Keep the pre-amp close by to use a reference and offer it up to the hole frequently so you know exactly which bits need attention.
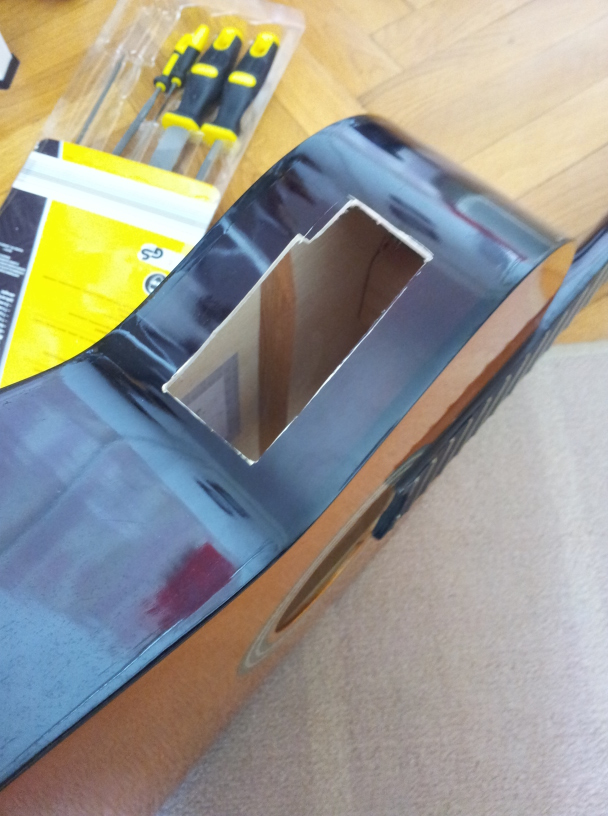
Peel the tape off once it all feels ok, and… voila! A hole. Considering how woodwork-challenged I am, this was a major achievement for me, I can tell you!
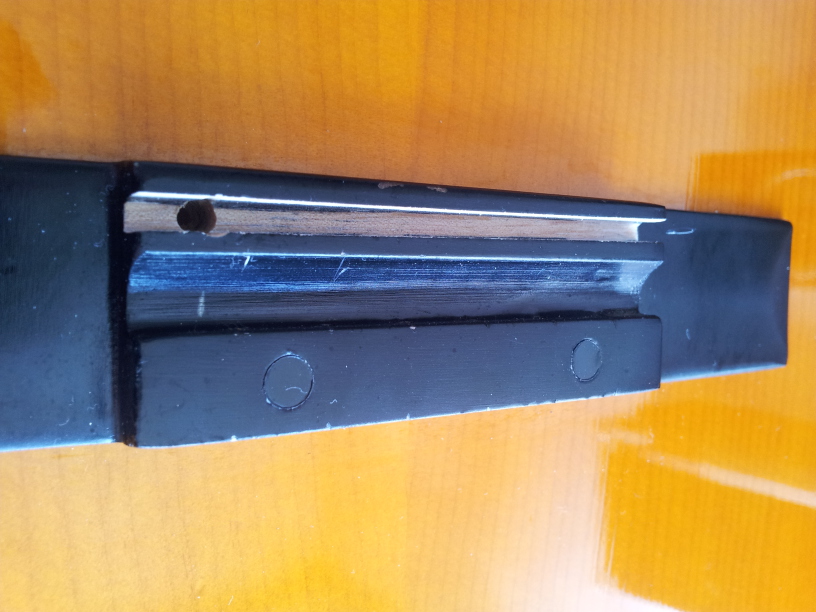
Now we need to drill a hole in the bridge’s saddle mount (not the saddle!) which will take the piezo sensor cable. Remember that right angled wire on it? Hopefully this makes more sense now. The sensor lies down underneath the saddle, and the cable which connects it to the pre-amp needs to be routed through the body and into the guitar. Don’t drill a too-large hole – this has to be big enough to allow the mini-plug through and that’s all. Align the sensor on the bridge’s saddle mount so it’s centralised, with the wire joint facing towards the low E string. That’s where the hole goes. You might need to use a small square needle file in the mount slot too, to try and turn the “U” shaped slot profile into a more squarer one. If you don’t, then the sensor won’t sit securely on the bottom and may move around, making nasty clicking noises in the audio.
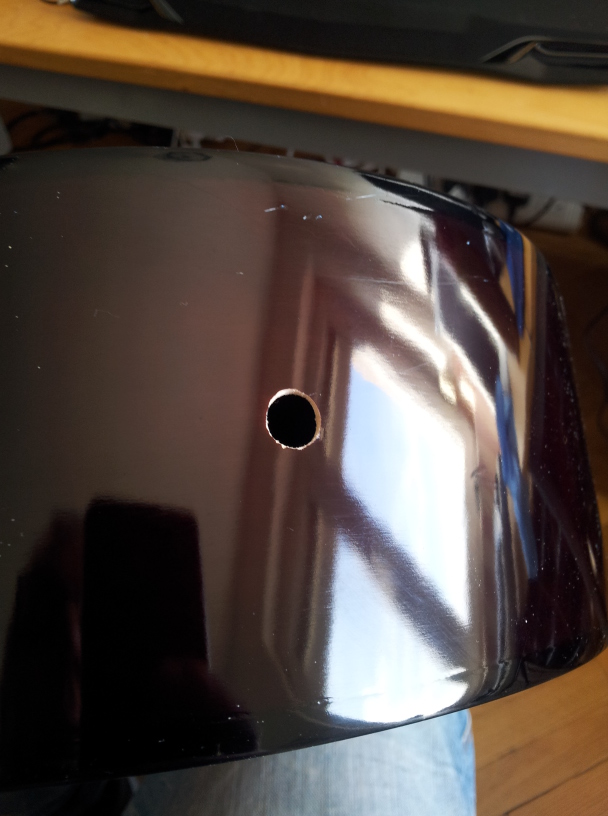
The final hole that needs to be drilled is for the 1/4″ jack socket. Use masking tape to mark where the hole should go, this also stops the drill bit skidding around too. Tidy it up with a round needle file until there’s enough clearance using the end of the socket as a guide and then that’s the end of the wood working side of the project. Phew! Now hoover up all that sawdust from the inside of the guitar (and the floor!), and give it a good wipe down. We don’t want all that pesky sawdust getting in the way of the electronics.
OK, things are going to start happening quite quickly now, but take your time and it will all work out just fine! Firstly, offer up the piezo sensor and feed the cable through into the body of the guitar. Don’t tug the cable too hard as it looks (and probably is) extremely fragile. Poke the piezo mini plug end temporarily through the preamp hole so you don’t lose it! Some deft hand and wrist positioning through the soundhole is necessary, and a little patience too, to make this happen!
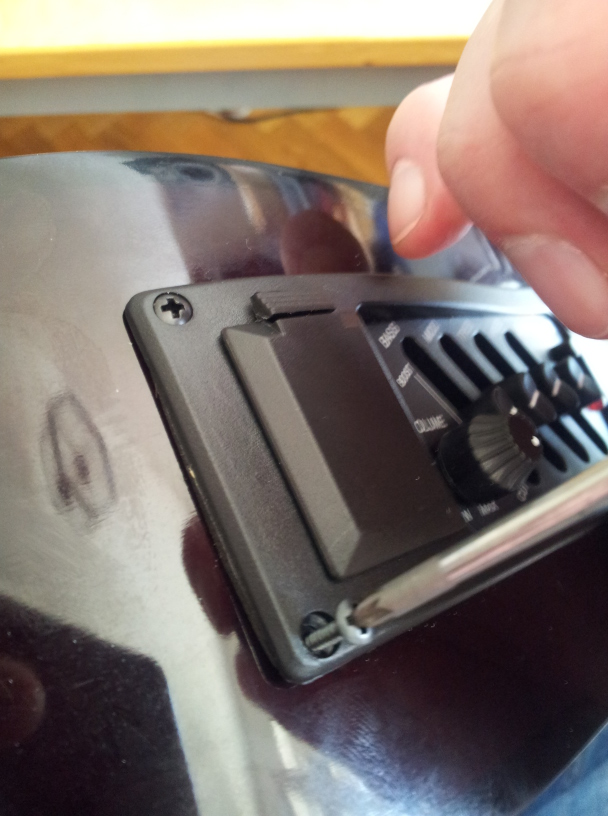
Plug the piezo mini plug into the mini socket on the preamp. Poke the output jack lead out through the soundhole for now. GENTLY wiggle the preamp into place, making sure you don’t trap the plugs and wires on the side. Offering it in at 45 degrees to start with I found helped here. Once it’s all snug, use the four screws to lock the preamp in place. If the curves aren’t looking quite lined up, here’s your last chance BEFORE screwing anything down to adjust the hole position slightly! Press with the screwdriver to start the hole then the screws should go in easily. Don’t overtighten! You can see in that picture how everything should look.
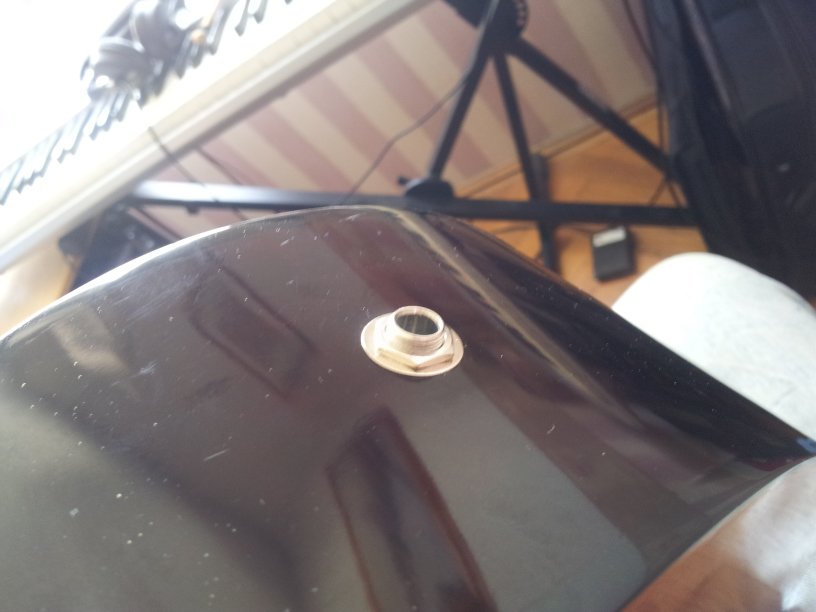
To get the jack socket installed takes a little bit of perseverance. The way I managed it was to feed a large nylon tie through the hole and into the body of the guitar, with the washer and jack socket nut already threaded onto the tie like a Shish kebab. Once the tie appeared with a little bit of guidance by the soundhole, I then pushed the jack socket firmly onto the end of the large tie and then gently pulled the tie and socket back until the socket thread was just showing through the hole. Using all my available powers of patience I eventually managed to get the nut started on the thread. Once it was started, I used a pair of needle pliers to grip the INSIDE of the jack socket and then used a spanner (that’s a “wrench” for you US peeps) to tighten the nut. I think in retrospect this was the most fiddly part of the whole operation, if I was doing this for a living I’d probably invest in one of those Stewmac 1/4 tighteners and use something more robust, like a 1/4 plug soldered to thick copper wire, to feed the socket through. You may find the washer that’s supplied is completely the wrong diameter. Mine was – but hey, what do you expect for a kit of this price! Luckily my “box of spares” to the rescue, and all turned out well. I think without the washer it’s putting too much stress on the curved body, poor old Zsolt’s got an electro acoustic and I noticed exactly this problem on his guitar too, the socket is looking very poorly and splintered around the hole. Maybe I’ll go and repair his next time I see him!
Now is a good time to pick up all the slack cabling inside the body and use the cable tie and sticky thing to fix the cabling securely to the base of the body. This way you can stop all the flapping cables that will surely haunt you when moving the guitar around, introducing an unexpected (and out of time) percussion section to your guitar playing!
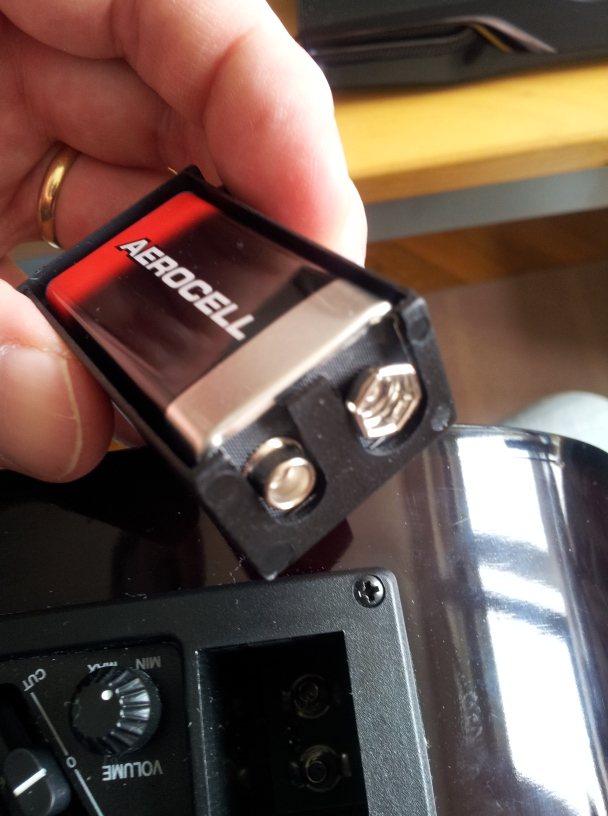
There’s a right way, and a wrong way, of installing a 9V battery. There’s no clip-on connector like in a guitar effects pedal, so initially I was a little worried I might install the battery the wrong way around, as it just drops in. This is generally considered to be a bad thing as super sensitive components don’t like that very much, unless they have (very rarely) special circuitry to stop reverse polarity wiping everything out. As it transpires, the holder in fact has a very cunningly chiseled out end which makes it impossible to get the orientation wrong. Phew!
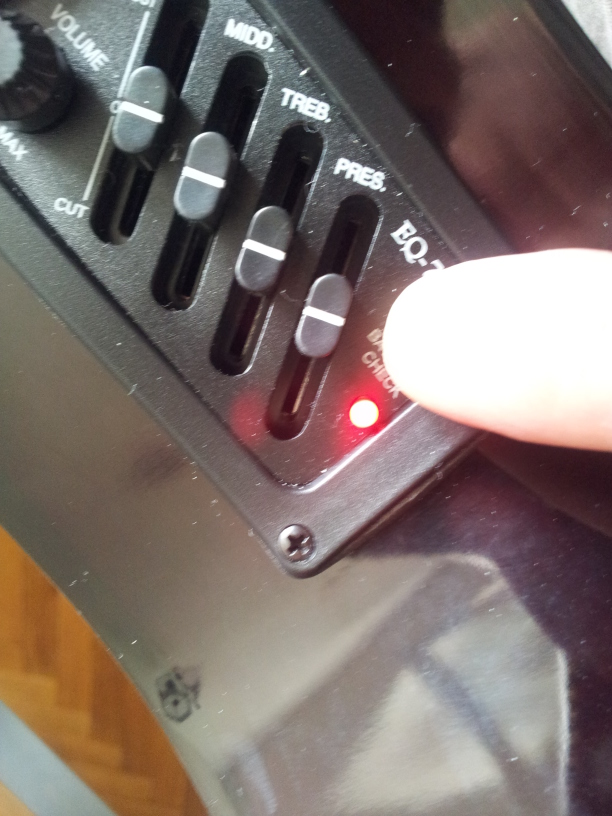
“picking up some dust . . . 30 feet, 2 1/2 down . . . faint shadow . . . four forward . . . drifting to the right a little . . . contact light . . . O.K. Engine stop.” Alright, maybe not as dramatic (or even a fraction as epic) as Apollo 11’s lunar landing, but seeing the little red light come on indicates to me that all systems are go, go, go for guitar! Pressing the little “Battery check” button tells me at least that the battery is the right way around. I bet even Eagle didn’t have one of those!
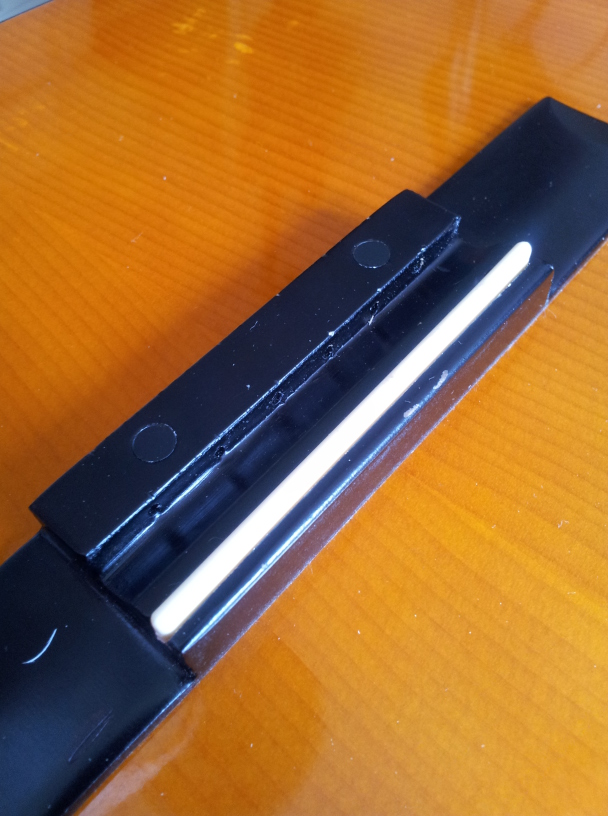
Did I say there’s not more woodwork? Well, I didn’t exactly lie, but I did forget to mention that you might want to keep the large file out. The thickness of the piezo sensor means that when you put the saddle back on, the strings will be higher by the bridge by, funnily enough, exactly the height of the piezo sensor. So now you’ll need a little more patience, and preferably a good digital caliper, to file away the underside of the saddle until you’ve removed exactly the height of the piezo sensor. Once it’s done, you will have a much thinner saddle – you may need to use some deftly added masking tape to one side of the saddle to stop it wobbling. Don’t use tape on the underside, as this will affect the sound transfer from strings to pickup.

Now’s the time to restring (I’d recommend a new string set at this point, to stop the possibility of the old set just having enough of being restringed and snapping!) and tune roughly into key. You’ll find the guitar needs to settle in for a few days until the tuning stops moving around so much, so don’t worry if it keeps going out of tune every few hours, this is normal and you just need to keep at the retuning! Check to make sure the action is about the same – if it’s still too high you might need to lop some more off the saddle. Don’t take too much off as you’ll get the dreaded string buzz on the higher frets, only cure is a new saddle!
Well, congratulations, you’ve now made your acoustic an electro-acoustic! It took me about 4 hours from beginning to end, including all the hoovering, to get the guitar converted. Expect to hear it being used in the next computerchemist albums at some point… and do let me know if you’ve taken the challenge up (or may have converted one already). I’m seriously eyeing up the possibility of adding a piezo to one of the electric guitars next.. could be interesting!
– Dave Pearson
where can I purchase the parts for the project and what did you do about a strap button?
I just used ebay, look for an acoustic preamp kit with peizo pickup and there are plenty to choose from 🙂
Well explained. Thanks. Does this particular preamp come with a tuner? It doesn’t seem to say …or perhaps I am not looking closely enough?
Thanks for the feedback! No, it doesn’t.. but I think some other preamps may do.
I’m gonna do this next week! Thanks for making it less scary. Somebody gave me an old 12-string to fix up, so I’m looking forward to setting the neck, restringing, and electrifying it! I actually have a piezo kit with a tuner, so that’s a plus!
Cool! Do let me know how you go on, glad I could help! 🙂